Why Does a Mud Pump Piston Rod Fail?
Why Does a Mud Pump Piston Rod Fail? The answer usually begins with small changes, not a dramatic break. In the field, technicians may notice polished wear marks, dark oil, or a faint knocking sound near the fluid end. These details matter. A Mud Pump Piston Rod works under repeated load, pressure pulses, friction, and chemical exposure. Any weakness can grow quickly during a long drilling cycle.
Drilling engineer George E. King has stated, “A pump rarely fails without warning; the warning is usually found in the details.” That principle fits piston-rod failures closely. Misalignment can create uneven contact with the packing. Excessive tightening can generate heat and scoring. Poor lubrication may leave blue discoloration on the rod surface. A cracked thread or damaged clamp can then turn vibration into a serious failure. Sometimes, the visible damage is only the final symptom.
This article examines the practical causes behind these failures. It considers rod bending, packing wear, hydraulic shock, corrosion, installation errors, and unsuitable operating conditions. It also explains how inspection records, manufacturer limits, and vibration trends support a more reliable diagnosis. A basic visual check is useful. It is not enough. Some failures develop beneath the packing or inside the connection, where operators cannot see them easily.
The discussion may not offer a perfect answer for every rig. Field conditions vary. Maintenance records can also be incomplete. That limitation deserves attention. Still, careful measurements, clean components, correct torque, and timely replacement can prevent a minor defect from becoming an unplanned shutdown.
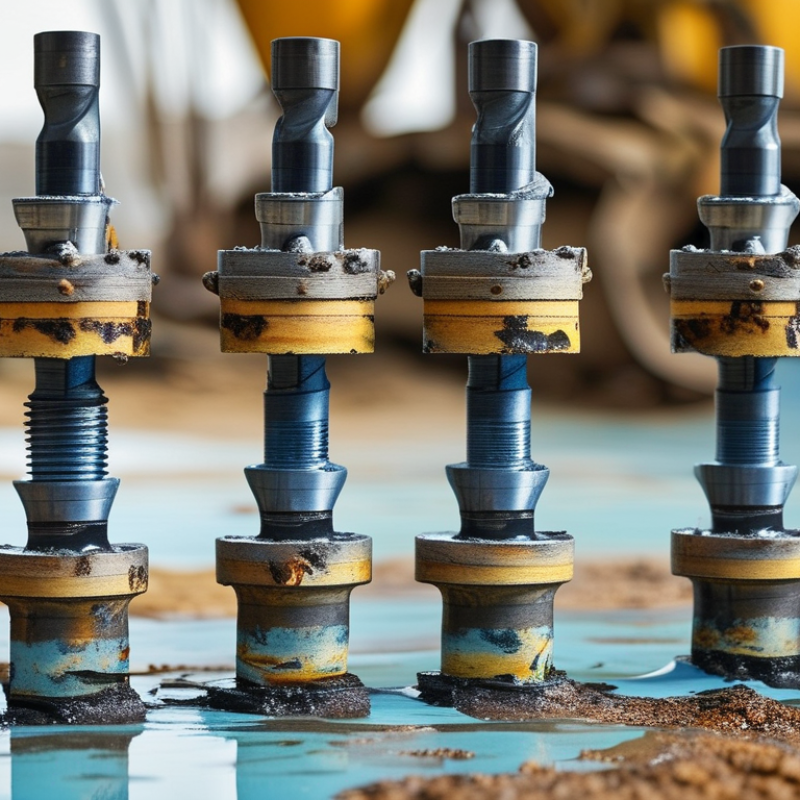
What Loads Act on a Mud Pump Piston Rod at 5,000–7,500 psi?
Why Does a Mud Pump Piston Rod Fail?
What Loads Act on a Mud Pump Piston Rod at 5,000–7,500 psi?
At 5,000–7,500 psi, hydraulic pressure creates a severe axial load on the piston rod. The basic force equals pressure multiplied by piston area. A six-inch piston at 7,500 psi can generate approximately 212,000 pounds of force. This load reverses every stroke, producing repeated tension and compression. It is not a steady pull.
Pressure spikes add another problem. Fast valve closure, gas-cut mud, or restricted flow can create short overloads above the gauge reading. The rod also carries acceleration forces from the crank and crosshead. These forces increase when stroke speed rises. Heat and friction near the packing area can further weaken the surface.
Bending usually begins with misalignment. A worn crosshead guide, loose connection, or uneven packing can push the rod sideways. Even slight bending creates stress concentrations at threads, shoulders, and polished transitions. Field inspections often find fatigue cracks near these locations. Corrosive drilling fluid can deepen small surface marks. That detail is easy to miss.
A pressure calculation alone is incomplete. It ignores vibration, impact, and imperfect alignment. I have seen clean-looking rods fail after repeated service because inspection focused only on diameter loss. Magnetic particle testing, runout checks, thread inspection, and torque verification provide stronger evidence. Still, maintenance records may not capture every pressure spike. That uncertainty deserves attention.
How Hydraulic Shock and Cyclic Fatigue Initiate Rod Cracks
Why Does a Mud Pump Piston Rod Fail?
How Hydraulic Shock and Cyclic Fatigue Initiate Rod Cracks
A piston rod rarely fails without warning. Hydraulic shock starts the process. When a discharge valve closes rapidly, fluid momentum creates a pressure spike. In a triplex pump, the rod may experience repeated tensile and compressive loads during every stroke. API RP 7K (2022) emphasizes pressure-control discipline, pulsation management, and inspection of reciprocating equipment. Yet many maintenance teams still record only average pressure, not the shock peaks that damage rod surfaces.
The crack usually begins near a thread root, shoulder, or polished transition. Small machining marks act like sharp notches. Cyclic fatigue then grows the crack with each stroke. ISO 14224:2016 recommends recording failure mode, operating hours, and equipment condition separately. That data can reveal patterns hidden by “normal wear” reports. Field reliability studies often place cyclic fatigue among the leading causes of reciprocating-pump component failures, especially where pressure pulsation and misalignment occur together. The number matters less than the mechanism.
Look closely at the rod during inspection. A dull circumferential line may be an early crack. Blue discoloration can indicate frictional heating. We sometimes blame the seal first. That assumption deserves reconsideration. Poor lubrication, abrasive fluid, excessive packing pressure, and rod misalignment can accelerate crack growth. Dye penetrant or magnetic-particle testing should follow cleaning, because mud residue can hide a defect. One missed inspection cycle may turn a visible flaw into a sudden fracture.
Why Misalignment, Wear, and Galling Accelerate Rod Failure
Why Does a Mud Pump Piston Rod Fail?
A mud pump piston rod rarely fails without warning. Misalignment is often the first hidden cause. When the rod, crosshead, and fluid end are not concentric, side loading develops during every stroke. The rod then rubs against the packing, creating uneven wear and localized heat. A small offset is easy to dismiss. That is a mistake I have made during inspections. Shiny wear marks on one side often reveal more than a normal visual check.
Wear changes the rod’s surface condition. Scratches, pits, and reduced diameter give abrasive particles places to settle. Poor lubrication can then turn sliding contact into metal-to-metal friction. Galling may begin as a narrow rough patch. It can spread quickly under heavy load. In the field, I look for torn packing, reddish debris, and a dull band near the packing area. These details often appear before a sudden break.
Inspection should include rod runout, packing compression, crosshead alignment, and fluid-end connection condition. A straightedge helps, but a dial indicator provides better evidence. Operators should also compare wear patterns after each maintenance cycle. Not every failure comes from one cause. Excessive packing pressure may be blamed, while a bent support or loose connection remains unnoticed. That assumption deserves another check. Correcting alignment, replacing damaged packing, and improving lubrication can reduce galling, but only when measurements confirm the real source.
How Packing Leakage and Mud Abrasion Damage the Rod Surface
Why Does a Mud Pump Piston Rod Fail?
Packing leakage is often the first visible warning. During field inspections, a wet rod usually shows a narrow, polished track near the packing contact zone. That moisture carries abrasive mud particles toward the rod surface. IADC technical papers commonly report drilling-fluid solids between 5% and 15% in demanding operations. Even small particles can score chrome or exposed steel when pressure repeatedly reverses.
The damage accelerates when packing pressure is uneven. API RP 13B-1 and API RP 13B-2 emphasize routine testing of mud properties, including density, viscosity, and solids content. These values directly affect leakage and wear.
A 1.2–2.2 SG mud can impose substantial hydraulic loading, especially when the rod has minor misalignment. The rod may look acceptable during a short visual check. It may already have a deep circumferential groove.
Temperature adds another problem. Friction heats the packing, hardening or shrinking its sealing lips. Field reliability reviews published through IADC frequently identify poor cooling, excessive packing compression, and unfiltered leakage as recurring contributors. That pattern is not absolute.
Human inspection errors still matter. Operators sometimes tighten packing to stop leakage, but excessive compression can increase friction and destroy the sealing element faster.
Measure the rod runout, check packing temperature, and examine the leakage path under magnification. A clean-looking rod is not always a healthy rod.
Which Inspection Data Confirm Failure and Prevent Recurrence?
A mud pump piston rod rarely fails without leaving measurable evidence. Inspection should begin with the fracture surface, not assumptions. A brittle-looking break may suggest overload, while beach marks often indicate progressive fatigue. Photograph the fracture before cleaning it. Record its location, direction, and distance from the thread or sealing area.
Measure rod diameter at several points and compare readings with the approved service limit. Check straightness using total indicated runout, especially near the crosshead connection. A dial indicator can reveal bending that is invisible during normal operation. Inspect threads for flattened crests, galling, and local discoloration. Magnetic particle or dye penetrant testing can expose surface cracks. Hardness readings also matter when abnormal heat treatment is suspected.
Inspection data must be compared with operating records. Review discharge pressure fluctuations, stroke rate, lubrication interruptions, and packing adjustments. Examine the liner, piston, crosshead bore, and guide surfaces for uneven contact. A pressure spike alone does not confirm the cause. Several small clues usually form the stronger conclusion. For example, repeated rod bending, one-sided packing wear, and elevated runout may indicate misalignment. Contaminated lubricant can support the finding, but it is not proof by itself. I have seen maintenance teams replace the rod and overlook the guide clearance. The new rod then failed early. Trend charts, calibrated tools, photographs, and preserved failed parts make recurrence prevention more reliable. Record the uncertainty, too. It improves the next inspection.
Why Does a Mud Pump Piston Rod Fail?
Inspection data that confirms failure mechanisms and helps prevent recurrence
Fatigue cracks, seal-track wear, corrosion pitting, excessive runout, and thread damage are the most useful inspection indicators. Dye penetrant or magnetic-particle inspection confirms surface cracks, dimensional checks identify wear and bending, and visual inspection reveals corrosion and thread damage. Corrective actions should address alignment, lubrication, seal condition, fluid contamination, and operating loads before installing a replacement rod.